Build a Sled Kite
| Category | Activities |
| Badge | Flying Models |
| Time to allocate (mins) | 30 |
| Outcome | Build a simple sled kite |
| Resources | Dustbin bag Long ruler Marker String Tape 2 x dowel rods per kite |
| Instructions | How to Build a Sled Kite Measuring the Sail 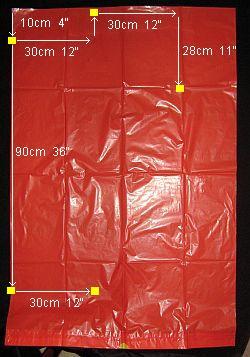 Place your plastic bag flat on the floor, with the closed end at the top. Starting from just below the top-left corner of the bag, measure and mark five dots on the plastic. I've highlighted the dots in yellow, in the photo. Judge the horizontal and vertical directions by eye. If you're careful, there's no need for a T-square. 2. How to Build a Sled Kite Cutting the Sail 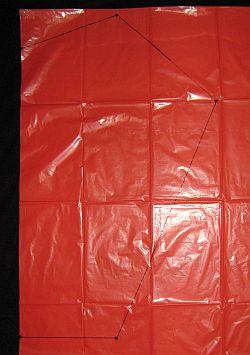 Take your ruler and connect the dots with the black marker pen, as shown in the photo. (OK, the lines appear a bit faint in the photo!) Flip the plastic over and trace over all the black lines. Cut along the top and right side of the bag, and open it out to show the complete sail outline, as in the first photo above. Take your scissors and cut along all the black lines. As in the second photo above, your sled kite sail is nearly complete! 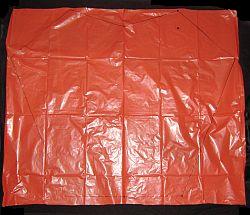 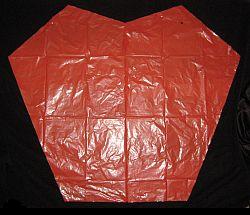 3. How to Build a Sled Kite Adding the Spars Lay down a length of your 5 mm (3/16 in.) dowel on the sail, line it up with a top sail-corner and saw it off at the bottom corner. See the first photo, above, where the dowel has not yet been cut. Cut off a 5 cm (2 in.) length of insulation tape, and stick down the dowel to the plastic. See the second photo. Do the bottom end of the dowel the same way and also add tape across the center of the dowel. Do the other dowel the same as the first one, so the kite looks like the third photo. 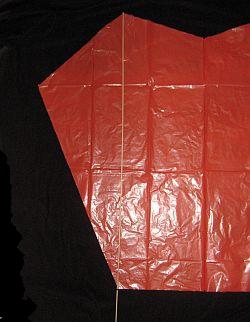 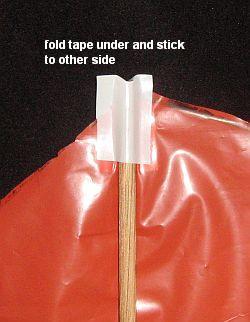 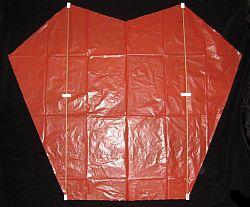 4. How to Build a Sled Kite Towing Points Snip off two pieces of electrical insulation tape, each 10 cm (4 in.) long. Go to the right-most corner of the sail, and lay down the tapes as shown in the first photo above. Fold the tapes around onto the underside of the plastic, as shown in the second photo above. Press firmly all over to make sure the tapes are fully stuck to the plastic. Go to the left side of the kite and do exactly the same thing, using two more strips of tape. All that remains is to add the bridle! 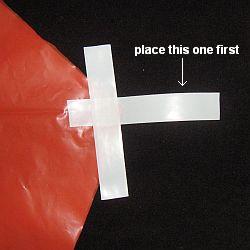 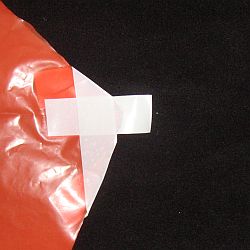 5. How to Build a Sled Kite Attach the Bridle 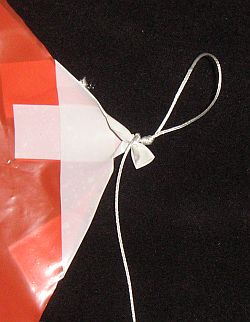 Cut off a length of flying line that is at least five times longer than the kite is tall. Tie one end of the line to the right side towing point of the kite, as in the photo. Use any knot you know but make it as tight as possible, to crush the tape. (I've used a double-wrap slip knot, terminated with a double loop knot ;-) ) Similarly, tie the other end of the line to the other towing point. 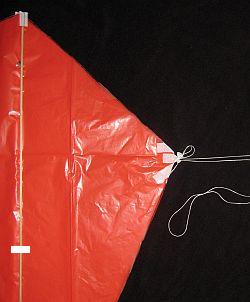 Nearly finished! Lay the kite on the floor, folded in half so the towing points and spars are one on top of the other. See the photo. Stretch out the bridle lines and tie a simple loop in, right near the end. The two bridle lines should be exactly the same length. I've brought the loop knot back into the picture, so you can see it in the photo. Your flying line can now be tied to the loop. (An easy-to-remove alternative is to Lark's Head the flying line behind the knot.) That's it, you're ready to fly. And now—FLYING! Remember that the dowel spars need to be on the downwind side of the kite when flying. That's on the side facing away from you in other words. You can see them through the plastic in that photo up there. Avoid flying in very windy weather. It only takes a light breeze to keep this sled design aloft. In some ways, it's actually more fun to fly single-line kites in light wind. By watching, you can learn a lot about what's happening up there. |